How To Jailbreak iOS 6 Beta 3 With RedSn0w 0.9.13dev3 On Windows
Step 1) Download RedSn0w 0.9.13dev3 for the Windows operating system using the download mirror below or through the iJailbreak Downloads Section.
Download RedSn0w 0.9.13dev3 (Windows)
Step 2) Once you have downloaded RedSn0w0.9.13dev3 you will need to launch it by first extracting RedSn0w, then right clicking on the RedSn0w.exe and clicking the Run as administrator option (if applicable).
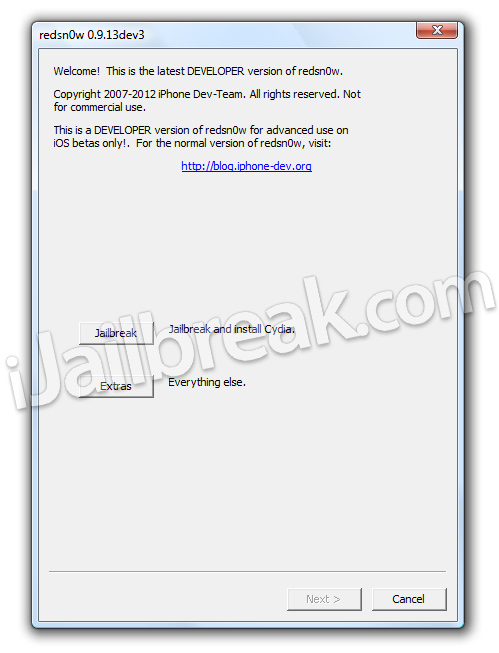
Step 3) With RedSn0w 0.9.13dev3 up and running you will need to click the Extras button. You will now see a few buttons presented to you. The button you are interested in is the Select IPSW button. Click this now and select your iPhone’s corresponding iOS 6 beta 3 firmware.
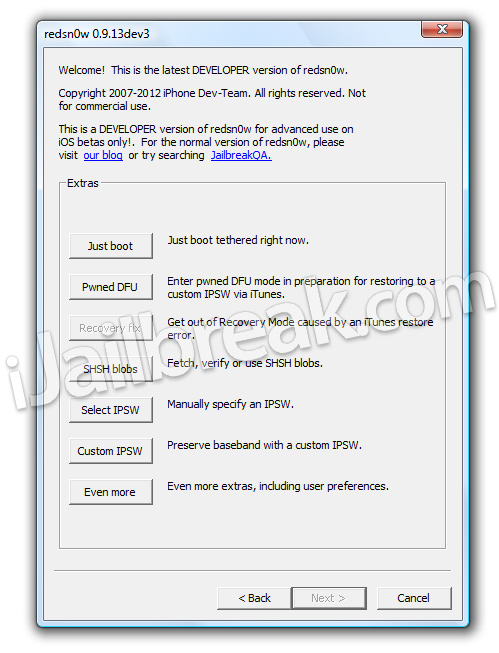
Step 4) Upon selecting the iOS firmware click the back button, followed by the Jailbreak button.
 Step 5) After clicking the Jailbreak button RedSn0w 0.9.13dev3 will begin processing the iOS 6 beta 3 firmware.
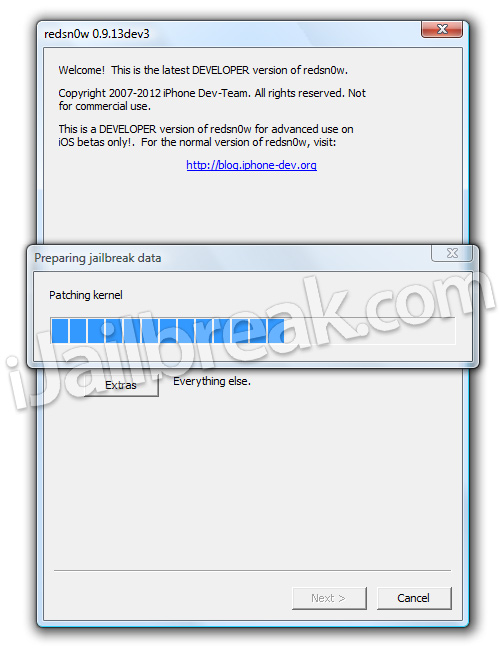 When
the firmware has been processed you will come to a screen with a few
options for your Jailbreak. Ensure that the “Install SSH” option is
checked at the minimum, click the Next button and you
will come to a screen where you will need to put your iPhone into DFU
mode. Read through and follow the instructions presented to you which is
to plug in and power off your iPhone and click the next button.
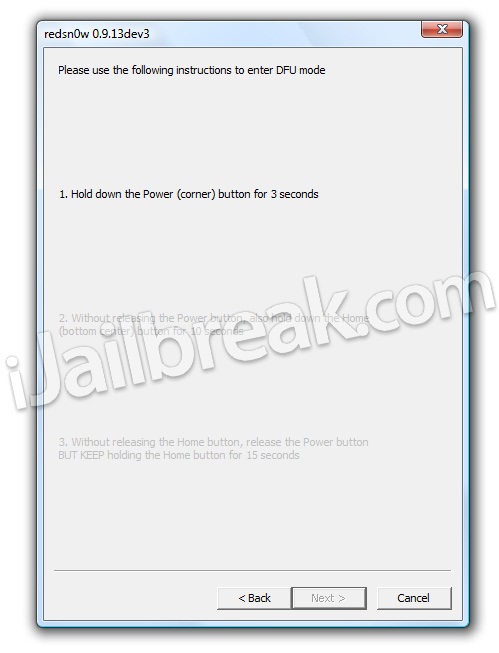
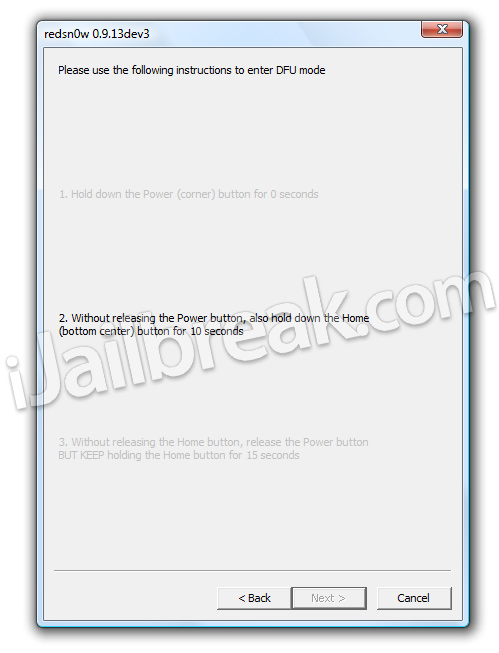
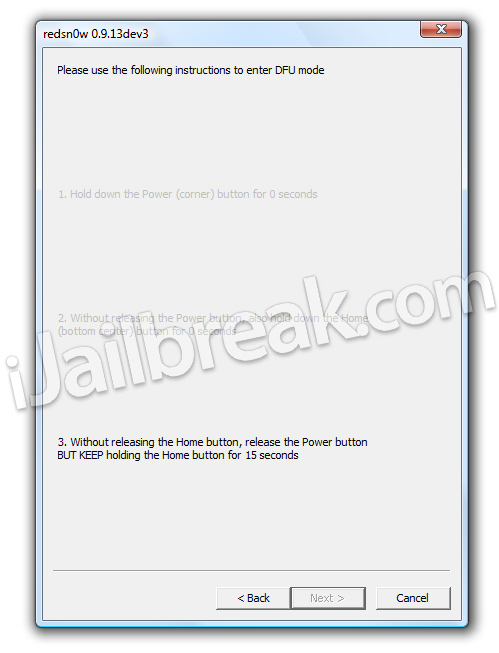
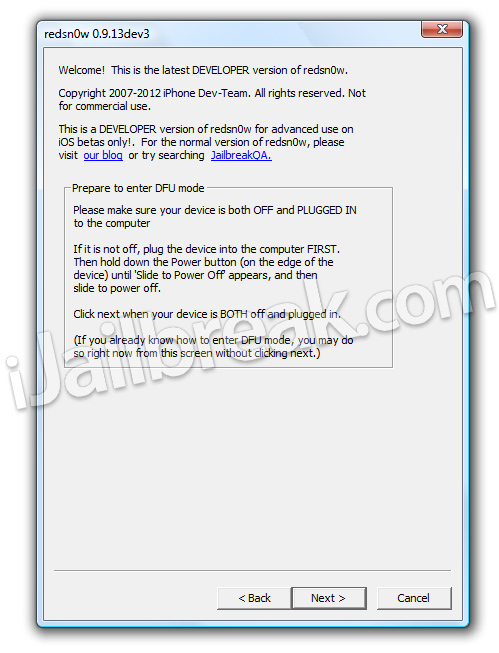 Step 6) When you click the next button you will need to follow the instructions presented to you to put your iPhone into DFU mode.
- Hold down Power (corner) button for 5 seconds.
- Without releasing the Power button, also hold down the Home (bottom center) button along with the Power button for 10 seconds.
- Without releasing the home button, stop holding down the power button for up to 15 seconds.
Optional: Booting Tethered - When you Jailbreak the iPhone running the iOS 6 beta 3 firmware you will have a tethered Jailbreak. Meaning in order for your iPhone to turn back on you will simply need to boot it using RedSn0w (this applies every time your iPhone loses power). To do this launchRedSn0w again and click the Extras Button > then click the Select IPSW button and select the iOS 6 beta 3 firmware again. Next click the Just boot button and you will need to put the iPhone into DFU mode again.

Note: Yes, you need to do this every time the iPhone loses power.
You should now have a jailbroken iPhone 4 or iPhone 3GS running the iOS 6 beta 3 firmware. For more tutorials visit the How To Jailbreak Section. Leave any questions in the comments.
Remember: Upon Jailbreaking
your iPhone 4 (CDMA/GSM) or iPhone
3GS with RedSn0w 0.9.13dev3, Cydia will not be installed. You will need
to manually do this by following this guide.

Blog post : difference between tethered and untethered jailbreak
ReplyDelete